OVERVIEW
The process of scheduling a recording session needs to be a seamless process for our clients. The checklist below will serve as documentation to make sure our clients are able to manage their own recording schedule to best fit their needs and the needs of their guests.
SCOPE
This process documentation aims to create a comprehensive checklist to follow for our clients to manage their own recording schedule held at our studios. This checklist encompasses all activities needed in a step by step format to follow from the moment the client’s account is set up in our scheduling system until they run out of studio passes.
RESPONSIBILITIES
These steps are to be followed by any client needing to set up and manage their recording schedule.
PROCEDURE
- Go to https://www.podcastvideos.com
- Desktop users can either click on the "Member Login" link towards the bottom of the "Quick Links" menu at the left-hand-side of the webpage or click on the hamburger menu "☰" at the top right of the screen.
- Mobile users, click on the hamburger menu "☰" at the top right of the screen
- A new window will open for podcastvideos.mydeskworks.com
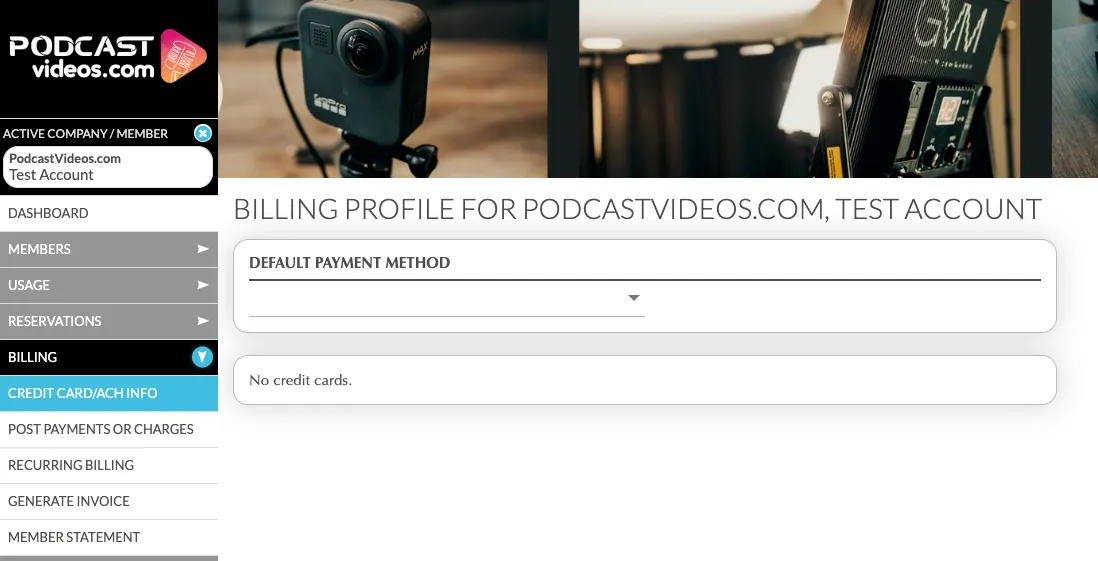
- Log in using the username and password provided by the PodcastVideos team
Create a New Reservation
- Expand the “Reservations” section on the left hand navigation
- Click on “Reservation Calendar” to see which rooms are available on a given day.
- Click on the date to show a full calendar to select a future date.
- You can use the zoom slide bar to get a better view of the available period
- You can use the “Day View” drop down on the right corner to select a “Week View” if preferred.
- You can also use the slider bar at the bottom of the screen to move the view left or right.
- Click on the Day / Time slot for the room you would like to reserve.
- The screen will move to the “Make a New Reservation” window.
- You can skip the steps above and start here if you know which room you want
- Make sure the correct room is selected.
- Answer the following questions
- Does not repeat
- Will the reservation include remote guests
- How many users will be recording
- Enter guest names
- Select the beginning time of your desired appointment
- By default, only a 30 minute time slot is selected
- Each reservation pass is equal to an hour
- Customers can opt to record multiple sessions during that one hour period.
- Each session uses at least one reservation pass
- Select the ending time of your desired appointment
- Click “Make Reservation
- A confirmation window will display
- Confirm the information provided
- Click “Confirm”
- Click “Sign Out” to end your session in our system
Update or Delete a Reservation
- Click “View/Edit Reservation”
- The window will display all of your reservations
- Hover over the reservation you would like to change or delete
- New icons will appear on the right side of the screen
- Click on the pencil icon to update the reservation
- Update as needed
- Click on the “Save Reservation” button
- Click on the red “X” to delete a reservation
- Click on the “Cancel Reservation” button
- Click “Confirm”
- Click “Sign Out” to end your session in our system
REFERENCES
Business Process - Scheduling a Recording Session on a Client's Behalf
VERSION CONTROL
|
Date of Update |
Updated By |
Update Comments |
|
10/7/2025 |
Nathan Sellars |
Original Version |
|
|
|
|